In the comfort of your cozy living room, a damp, potentially damaging basement is likely the farthest thing from your mind. Yet, it’s in these unseen areas where the integrity of your home truly comes into play. As you’re considering a waterproofing project for your basement, it’s essential to plan meticulously. You need to assess the condition of your basement, choose the right waterproofing method, and decide whether to tackle the work yourself or hire a professional. But how exactly do you navigate these decisions to guarantee you’re not only protecting your home but also making a wise financial investment?
Understanding Basement Waterproofing
Before plunging headfirst into your basement waterproofing project, it’s important to fully understand what basement waterproofing involves. It’s a process designed to prevent water from entering your basement, keeping it dry and structurally sound. This isn’t just about slapping on some waterproof paint and calling it a day. It requires an all-encompassing approach and careful planning.
Firstly, you should know that waterproofing techniques vary based on different types of basements and their unique problems. For instance, you may have to deal with condensation, runoff, or subsurface seepage. Understanding these issues helps in determining the best solution.
Secondly, there are two main types of waterproofing – interior and exterior. Interior methods often involve sealants and coatings applied to basement walls and floors, diverting water to a sump pump system.
Meanwhile, exterior waterproofing, considered more effective but costly, involves excavating around the house, applying a waterproof coating to exterior walls, and installing a drainage system.
Lastly, waterproofing isn’t a one-size-fits-all project. Each home has its unique needs, and what works for one mightn’t work for another. Therefore, it requires a tailored approach, factoring in your home’s age, construction, and geographical location.
Stick around as we explore deeper into this subject in the next segment.
Assessing Your Basement’s Needs
First off, it’s crucial to assess your basement’s specific needs to plan an effective waterproofing project. Don’t just jump into waterproofing without a thorough assessment. It’s like a doctor’s diagnosis – you can’t treat if you don’t know what’s wrong.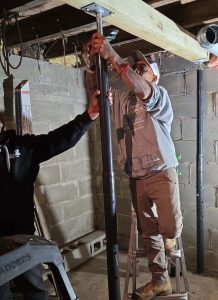
Start by inspecting for visible signs of moisture or water damage. This could be water stains, peeling paint, or mold growth. Note the severity and location of each issue to help pinpoint potential sources of the problem.
Next, consider your basement’s usage. Is it just for storage or do you have a finished living space down there? Your needs will vary depending on how you use the space. For instance, a finished basement may require more extensive solutions, such as interior drainage systems or sump pumps, while a storage basement might only need basic waterproofing.
Also, think about the age and construction of your home. Older homes may have more structural issues that need to be addressed before waterproofing can occur. Similarly, some construction materials may be more prone to water damage.
Choosing the Right Waterproofing Method
Now, let’s focus on how you can choose the right waterproofing method for your basement.
First, you’ll need to assess the sources of your basement leaks.
After that, you can start to select a waterproofing solution that best fits your needs and understand the costs associated with it.
Assessing Basement Leak Sources
Often, properly evaluating the source of basement leaks can be a critical step in choosing the right waterproofing method. Don’t just slap on a patch and hope for the best. Instead, meticulously investigate the problem area to determine exactly where water is seeping in.
Water can enter your basement in numerous ways. For example, it could be coming through cracks in your walls or floor, or perhaps it’s seeping in from the outside due to poor drainage. Sometimes, high humidity levels can cause condensation, which may also lead to wet spots.
Take your time to thoroughly inspect all possibilities. It’s best to do this during or after heavy rainfall when leaks are most likely to occur.
Remember, the location of the leak can give you valuable clues about its source. Is the water coming in at the top of your walls? This could indicate a problem with your gutters or downspouts. Dampness near the bottom might suggest a foundation issue.
Ultimately, the goal is to find the root cause of the problem, not just the visible symptoms. By doing this, you’ll be better equipped to choose the most effective waterproofing solution for your basement.
Selecting a Waterproofing Solution
After pinpointing the sources of your basement leaks, it’s time to roll up your sleeves and explore selecting the ideal waterproofing solution. This process isn’t as intimidating as it may seem, provided you’re armed with the right information and a clear understanding of your basement’s specific needs.
First, consider the nature of your basement. Is it fully or partly underground? Does it suffer from condensation, seepage, or both? These factors greatly influence your choice of waterproofing.
For minor seepage or condensation, a waterproofing paint or sealer might suffice. They’re easy to apply and relatively inexpensive. However, they’re only a surface-level solution and won’t tackle serious leaks.
Interior water drainage is another option, addressing water that’s already found its way into your basement. But keep in mind, it doesn’t prevent water from entering; it simply manages it once it’s inside.
Exterior waterproofing, on the other hand, is the most thorough solution. It prevents water from entering your basement in the first place. Yet, it’s more complex and costly, requiring excavation around your home.
Understanding Waterproofing Costs
Having considered various waterproofing solutions, it’s important to take a moment to understand the financial implications of each method. Waterproofing costs can vary greatly, depending on factors like the size of your basement, the extent of the water issues, and the method chosen.
In general, internal waterproofing is less expensive than external, but it’s not always the most effective option. You’ll need to weigh the cost against the level of protection provided. Sealing cracks and installing water barriers might cost less upfront, but if you’re dealing with major flooding issues, you might need more robust solutions like a sump pump or exterior waterproofing. These methods are more costly but offer long-term peace of mind.
Get multiple quotes and ask detailed questions about what each quote includes. Remember, you’re not just paying for materials, but also labor, expertise, and possibly ongoing maintenance.
Don’t be tempted to cut corners to save money. A poorly done job could end up costing you more in the long run. It’s a significant investment, but one that’s worth it to protect your home and prevent costly water damage repairs in the future.
Prepping Your Basement for Waterproofing
Before you start your waterproofing project, it’s essential to prepare your basement properly.
Start by evaluating the condition of your basement, looking for any signs of existing damage or issues.
Then, clear out the area to guarantee you have easy access to all surfaces, and identify any potential leaks that need to be addressed during the waterproofing process.
Assessing Basement Condition
Water damage lurking in your basement can be a homeowner’s worst nightmare. But don’t fret, you’re on the right path by deciding to waterproof. Now, it’s essential to assess your basement’s condition before proceeding. This gives you a clear understanding of the extent of the problem and helps you plan the waterproofing process effectively.
Start by inspecting your basement walls and floor for cracks, which could be entry points for water. If you spot any, mark them for future repair.
Check for efflorescence, a white powdery substance caused by water seepage, and signs of mold or mildew, which indicate moisture problems.
Look for damp spots and water stains, too. They’re telltale signs of water intrusion.
Check your basement’s smell. If it’s musty, it’s a red flag for moisture issues.
Examine the condition of any paint or wallpaper. Peeling or bubbling indicates water damage.
Also, check for rust on metal surfaces and rot on wooden elements.
This initial assessment is vital in formulating an effective waterproofing plan.
Clearing Basement Area
In preparation for your waterproofing project, you’ll need to clear out your basement area. This is an essential step that can’t be overlooked, as it allows for a thorough assessment and application of waterproofing measures.
Tidy up the space; remove all items, furniture, and storage boxes. Be meticulous and leave no corner untouched.
While clearing, think strategically. Divide your basement into sections for efficient cleaning. You’re not just tidying up; you’re prepping the groundwork for a successful waterproofing project. This means ensuring that the area is free of debris, dust, and grime that could interfere with the process.
Sweep and vacuum the entire area.
Once you’re done, double-check. Did you miss anything? Remember, this isn’t about making your basement look pretty. It’s about creating an ideal environment for waterproofing. Any overlooked spots can compromise your efforts.
Be thorough, be patient, and be attentive to detail.
Identifying Potential Leaks
As you’ve diligently cleared and cleaned your basement, it’s important to put on your detective hat and start identifying potential leaks. Spotting these leaks early can save you a lot of time and money down the line.
Begin by inspecting the walls and floors for any signs of moisture or water stains. Look for discolored patches or areas that feel damp to the touch. It’s also important to check for cracks in the walls or flooring. Even the smallest of cracks can be an entry point for water.
If you’ve noticed a musty smell, that’s another telltale sign of a potential leak.
Don’t neglect to check around windows and plumbing as well. Leaks often occur in these areas, especially if the sealant has worn away. A flashlight can be your best friend during this process, helping you spot water trails and damp areas.
Once you’ve identified potential leaks, mark these spots with a waterproof marker. This step will help you address each problem area when you begin the waterproofing process.
DIY vs. Hiring a Professional
Many homeowners grapple with the decision between tackling a basement waterproofing project themselves or bringing in a seasoned professional.
It’s a tough call, but here’s the lowdown.
Going the DIY route can be tempting. It could save you some money, especially if you’re handy and have time on your hands.
But, it’s not always as simple as it looks. Waterproofing is a complex task that requires skill, knowledge, and the right tools. You’ll need to know how to identify the source of leaks, select the right waterproofing method, and apply it correctly.
If you’re not well-versed in these areas, you might end up doing more harm than good.
On the other hand, hiring a professional may cost more upfront, but it usually guarantees a job well done.
Professionals have the experience and equipment to handle unexpected situations. They’ll also be able to identify potential future problems and address them before they become major issues.
In the end, it’s about weighing up your abilities, time, and budget.
Remember, a botched DIY job could end up costing more to fix in the long run.
Estimating Your Waterproofing Costs
Whether you’ve decided to brave a DIY project or hire a professional, understanding your potential waterproofing costs is critical. It’s not just about the money you’ll spend, it’s about making certain you’re investing wisely in protecting your home.
Firstly, factor in the cost of materials. If you’re going it alone, you’ll need to purchase sealants, waterproofing paints, and potentially a sump pump.
Don’t forget to account for tools you may not have, such as a quality paintbrush or roller, and a masonry drill.
If you’re hiring a professional, get several quotes. Be sure they include all costs, not just labor but also materials and any hidden extras.
It’s always a good idea to have a contingency budget, too, as unexpected issues can arise during the project.
Then there’s the cost of your time. DIY projects can eat up weekends and evenings.
Make certain you’re realistic about your abilities and the time you have available.
Implementing Your Waterproofing Plan
Now that you’ve estimated your costs and procured all necessary materials, you’re ready to roll up your sleeves and start your basement waterproofing project.
First, you’ll need to clear out any items from your basement. You don’t want your stuff getting in the way or damaged during the process.
Once cleared, inspect the area thoroughly. Look for signs of existing water damage like mold, mildew, or water stains. These areas will need extra attention. If you’ve identified cracks or leaks, you’ll want to seal these with a waterproof sealant, ensuring it’s thoroughly dry before moving to the next step.
Next, apply your waterproofing paint or membrane. You’ll need a stiff brush for this job, working the product into every nook and cranny. Remember, it’s better to apply several thin layers rather than one thick one, allowing each layer to dry fully before applying the next.
Lastly, consider installing a sump pump if you don’t already have one. This will help to further protect your basement from future flooding.
Maintaining Your Waterproofed Basement
Having completed the hard work of waterproofing your basement, it’s time to turn your attention towards maintenance. Regular upkeep is essential to guarantee the longevity of your waterproofing solutions.
Don’t think of it as a chore; rather consider it an investment into your property’s value and your peace of mind.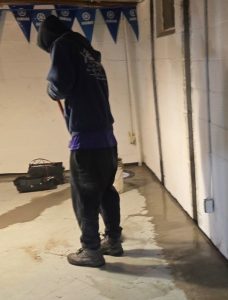
Start by scheduling regular inspections. This doesn’t have to be a professional job. You can easily do it yourself. Look for any signs of moisture or water damage. Pay close attention to walls, floors, and corners.
Catching potential problems early can save you costly repairs in the future.
Next, keep your gutters and downspouts clean. They play an important role in directing rainwater away from your foundation. If they’re clogged or not functioning properly, water can pool around your home, potentially causing leaks in your basement.
Lastly, consider installing a dehumidifier to control humidity levels. Basements are naturally damp places, and excessive moisture can damage your waterproofing system over time.
In wrapping up, don’t underestimate a solid basement waterproofing plan. It’s more than just stopping leaks; it’s about preserving your home’s value. Tailor your approach to suit your basement’s unique needs and don’t shy away from professional advice. Remember, a small investment now can save you from a costly disaster later. With careful planning, you can make your basement a dry, comfortable space, proving the theory that prevention is indeed better than cure.
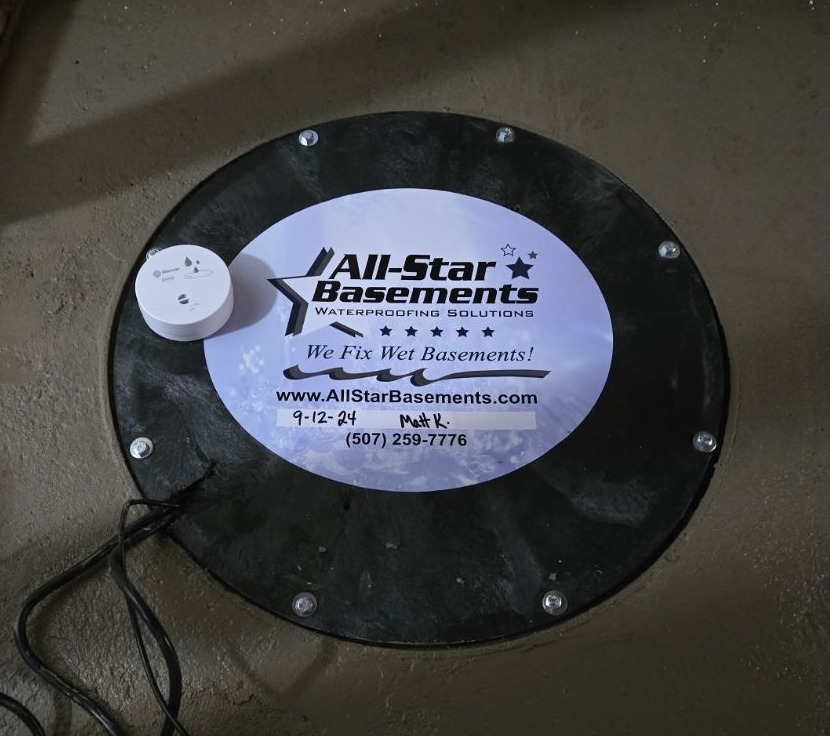
All-Star Basements is Locally Owned and Operated and based out of Rochester, Minnesota. We cover Southern Minnesota including the Twin Cities area, Western Wisconsin and parts of Northeast Iowa. Our team is committed to solving our customers’ basement waterproofing, foundation repair, or crawl space needs and offering multiple solutions to choose from.
As a proud member of the Basement Health Association and the National Waterproof Members of America, we have the best products available to solve your leaky basement, seepage, or flooding issues. Our lineup also includes multiple crawl space solutions.
If you have foundation problems that need any kind of repair, we can help! We feature the nationally renowned Grip-Tite Foundation Systems, which has a long history over 90 years of fixing homeowners’ foundation repair issues- from walls that are buckled, tipping or cracked and bowing.
At All-Star Basements, we are committed to providing multiple solutions to choose from to help fix any basement problem you may have. We are very proud of our Better Business Bureau A+ rating and take great pride in caring for all of our customers’ needs- big or small, we do it all!